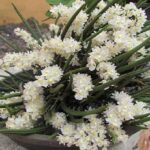
The Phalaenopsis orchids, commonly known as Moth Orchids, have gained significant attention among cultivators worldwide.
There are several reasons for this:
- The flowers are beautiful, long-lasting, and very eye-catching;
- Their cultivation is extremely simple;
- These orchids can be found in various orchid nurseries at an affordable price.
So, if you want to learn how to care for your Moth Orchid, discover its curiosities, and see photos of beautiful blooms, keep reading this text.
How to Care for Phalaenopsis Orchids
: 9-Step Care Guide")
To care for a Phalaenopsis orchid and make it bloom, you should provide the following care:
- Average to high temperature;
- Humidity ranging between 40% and 60%;
- Watering when the substrate dries out;
- Substrates with good ventilation for roots and good drainage;
- Fertilization with NPK 20 20 20;
- Planting in a transparent plastic pot;
- Prevent diseases by keeping them in clean places.
If you can provide these basic requirements for your Moth Orchid, it will be healthy and have incredible blooms.
Remember, Phalaenopsis orchids are among the orchids whose cultivation is simpler.
In other words, they are ideal for beginners.
Below, we will delve into each of the necessary care for this plant.
1 – Ideal Temperature
: 9-Step Care Guide")
The Moth Orchid is very famous for its easy cultivation.
This is mainly due to its excellent adaptation to the tropical climate.
It can withstand temperatures between 13ºC and 35ºC (55.4°F and 95°F)
Its ideal conditions are:
- Between 20 and 24ºC (68°F and 75.2°F) during the day
- At night, just make sure it doesn’t get colder than 16ºC (60.8 °F)
To make it bloom, ensure a temperature drop at night of 5ºC. (41 °F)
In other words, a temperature between 13 and 14ºC would be ideal.
2 – Proper Lighting
: 9-Step Care Guide")
Many people believe that orchids don’t like sunlight, but that’s a misconception.
In nature, these plants are usually protected from direct sunlight by tree leaves, so in most species, indirect lighting is ideal.
And this also applies to Phalaenopsis orchids.
To simplify, there’s a trick that can help you determine if the lighting is correct, see:
- Leaves darker than usual green, it’s receiving too little sun.
- More yellowish leaves, it’s getting too much sun.
If you want to learn more about what orchids might be trying to tell you with their leaves, check out the article spots on orchid leaves.
Remember, it’s always good to keep your moth orchid in a well-ventilated place.
This helps control humidity and keeps pests and diseases away.
3 – Humidity
: 9-Step Care Guide")
Humidity is something few cultivators worry about, but it’s essential for your plant’s health.
Although they like to be in more humid places, we shouldn’t overdo the humidity for Phalaenopsis orchids.
When in excess or lacking, this humidity can cause:
- Extremely harmful diseases for your orchid.
- Make it weaker, facilitating the appearance of fungi and bacteria.
So be careful not to let the wrong humidity interfere with your plant’s life.
: 9-Step Care Guide")
Ideally, you should maintain an environment with humidity between 50% and 70%, not varying much from this range.
To do this, just check if your environment isn’t too dry or too humid.
A tip is to check weather forecast websites as they will inform you about the humidity in your city.
Also, be careful not to let your Moth Orchid’s roots get too wet.
This can cause a disease called black rot.
4 – How to Water
: 9-Step Care Guide")
All orchids need water to survive, some more than others, like the Vanda orchid, while others need less, like the Cattleyas.
Knowing how to water your orchid is essential for successful cultivation.
Phalaenopsis orchids have specific characteristics when it comes to watering.
Understanding these characteristics will help you water your orchid more effectively (we also explain orchid watering in our free guide, which you can access below).
When to Water?
There are techniques to determine when it’s time to water your moth orchid.
- Check the moisture of the substrate with your finger: Place your finger in the substrate and see if it’s dry or nearly dry. If it is, water the orchid. Insert your finger halfway into the pot.
- Check the roots: This method is more reliable. Look at the color of your orchid’s roots. When they’re dry, they appear white or silvery, and when they’re wet, they turn green.
To water, thoroughly soak your plant until water drains out of the bottom of the pot.
Watering should be done in the morning so that the leaves have time to dry overnight.
After watering your orchid, make sure there is no accumulated water in the center of its leaves or flowers or at the bottom of the pot.
Accumulated water can lead to rotting of leaves or roots, hindering the plant’s development for a long time.
Regarding the type of water, ensure it is clean and at a comfortable temperature.
5 – Soil for Phalaenopsis Orchids
: 9-Step Care Guide")
Almost every orchid requires substrates, and Phalaenopsis orchids are no exception.
A good soil is one that meets your plant’s specific needs.
For the moth orchid, a good soil should provide:
- Good aeration
- Good drainage
- Long-lasting quality
Below, I’ve listed some of the best soil you can use for these orchids:
- Coconut fiber
- Charcoal
- Charred rice husk
- Pine bark, gravel,
- Medium pine bark, peat moss, etc.
- Sphagnum Moss
- Perlite
- Vermiculite
- Fir Bark
- Tree Fern Fiber
- Aliflor
A good idea is to mix these substrates.
And now, let’s learn how to clean your substrate to prevent it from causing diseases in your orchid.
You should clean it before putting it in your Phalaenopsis pot.
- Check if your substrate is clean.
- Then boil it for 10 minutes or soak it in bleach for 25 minutes.
- Rinse it thoroughly to remove the bleach.
Additionally, know that the substrate needs to be replaced periodically.
On average, the soil of these orchids is changed every 1 to 2 years.
This is because over time, it loses its usefulness and hinders the plant’s growth.
6 – Fertilization for the Moth Orchid
: 9-Step Care Guide")
There are two types of fertilization you can choose for your orchid: chemical fertilization and organic fertilization.
Chemical fertilization is faster and more efficient, but it’s more expensive, and you need to be more careful.
Organic fertilization is slower and might be less effective.
However, it’s cheaper as it uses natural elements in its composition.
If you want to fertilize your Moth Orchid organically, use the following fertilizers:
- Castor cake
- Bone meal
- Wood ashes
Each of these mixtures will replace an element of chemical fertilization.
Now, if you want to learn how to fertilize Phalaenopsis inorganically, you need to divide it into 2 periods:
- During flowering: fertilize once a week using NPK 10-30-20, as the plant needs more phosphorus and potassium during this period.
- During regular periods of growth: fertilize once a week using either NPK 10-10-10 or NPK 20-20-20.
Moth orchids require precise fertilization.
So, choose a specific day of the week for fertilization and stick to it.
Fertilization Tips
Remember that fertilizer should not touch the flowers or leaves of the Phalaenopsis.
Lastly, but not least, you should check if you’re over-fertilizing.
Below are some signs of this problem.
- Accumulation of salt in the pot (pay close attention to this sign).
- Her leaves are starting to burn (this could also be caused by too much sunlight).
- Her roots are burning or rotting (this could also be caused by accumulated water at the bottom of the pot).
To prevent this excess, there’s an extremely simple trick.
Reduce the recommended strength of the fertilizer by three.
For example, if the recommended dosage is one spoonful per liter of water, use one spoonful for every 3 liters of water.
7 – Where to Plant Your Phalaenopsis
: 9-Step Care Guide")
Phalaenopsis orchids are epiphytic (they naturally grow on trees), so they can be planted on trees, in cachepots, attached to wooden trunks, or, if you prefer, in a pot.
Ideal Pot
The best pot for Phalaenopsis orchids is a transparent plastic pot because it retains moisture well, helps the roots perform photosynthesis, and allows you to see the substrate and roots, making watering much easier.
But if you don’t want to use a transparent pot, you can use a clay pot or even a cachepot.
Recommended:
- Laelia Orchids – Learn All the Secrets to Cultivate Them
- The 7 Rarest Orchids in the World and Their Characteristics
As for the ideal size, a slightly tight pot helps the Phalaenopsis develop.
So, make sure the pot isn’t too spacious; choose one where the roots fill the entire space.
An overly spacious pot makes the roots too damp, leading to rot.
Can I Plant Phalaenopsis in Soil?
Most of the time, no, because Phalaenopsis orchids are mostly epiphytic.
This means they grow on tree trunks, so if you plant them in the ground, they probably won’t adapt.
How to Plant or Repot
Repotting the moth orchid is done approximately every 2 years.
To check if your plant needs a new home, see if:
- Your substrate is decomposed and very fine.
- The plant has outgrown its current pot.
If these signs are present, it’s time to repot.
But be careful because, as you read above, changing your orchid’s location can be very energy-draining for the plant.
Therefore, when repotting, choose a time when the plant isn’t expending too much energy.
The best time is 2 to 3 weeks after flowering.
To plant or repot your Moth Orchid in a pot, follow the steps below:
- Remove the orchid from the pot (be careful).
- Wet the pot.
- Squeeze the pot to compress the soil.
- Turn the pot upside down while holding the orchid.
- Clean it by removing all the substrate.
- Remove dead roots (use sterilized scissors).
- Place substrate at the bottom of the new pot (it should have good drainage).
- Examples: tile pieces, expanded clay* Add the new substrate to the pot.
- Fill it up to half.
- Tap the side of the pot to settle the substrate.
- Insert the plant.
- Position it slightly tilted so that water can drain from its leaves and flowers during watering.
- Add the remaining substrate.
- Tap the side of the pot to settle the substrate.
- Check if the plant is secure in the pot; if not, repeat the process.
- Place your plant in its designated location.
- It should meet the lighting, ventilation, and humidity requirements of your plant.
8 – Making Seedlings (Keikis)
: 9-Step Care Guide")
If you want to make seedlings from your moth orchid, there are some tricks that can help you.
- Leave your Phalaenopsis in a more humid environment with less light because you will increase the chances of your plant generating a keiki (seedling).
- After the keiki appears, wait for it to form its roots, and then cut it and plant it in a pot.
In addition to this natural way of generating a seedling, you can also encourage your moth orchid to create one.
But only do this if it doesn’t appear naturally.
- After your orchid blooms, cut the spike as if you were encouraging a new bloom (you will learn this below).
- This new spike that will grow can be a new bloom or also a new seedling.
You can also combine both tips to increase your chance of obtaining a new seedling.
In other words, cut the spike and keep your orchid in a more humid environment with less light.
9 – Pests and Diseases
Now, a quick overview of the diseases that can attack your moth orchid.
There is a great variety of diseases, pests, fungi, and bacteria that your orchid can contract.
To prevent your orchid from having these problems, just do the following:
- Keep it in ideal growing conditions.
- Good humidity, ventilation, watering, temperature, know how to replant correctly, clean substrates, etc.
- Always keep it in clean places.
Also, check out our article on Scale Insects on Orchids.
Blooming of Phalaenopsis
: 9-Step Care Guide")
: 9-Step Care Guide")
Blooming starts with the spike and develops into flowers over time.
These spikes are very important even after blooming because they can cause new blooms in the future.
Besides serving for new flowers, a flower spike can also develop seedlings, but this will depend a lot on the amount of light and also on pruning.
Blooming usually occurs between winter and spring, but this can vary widely.
Today, with the development of several hybrids, phalaenopsis does not have a fixed date for its blooms; many species can bloom at any time of the year.
Characteristics of the Flowers
: 9-Step Care Guide")
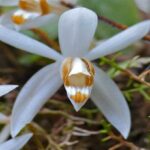
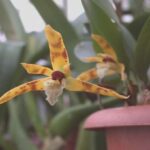
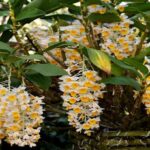
Without a doubt, the main attraction of any orchid is its flowers, and in the case of phalaenopsis, it is no different.
Its flowers are showy and very colorful, having a wide variety of possible colors.
Some of the most famous colors are:
- White
- Red
- Yellow
- Purple
- Creamy-greenish
- Among other colors
Moreover, it is with this species that many orchid enthusiasts attempt to generate the blue mystic, which is a blue orchid.
: 9-Step Care Guide")
Basically, they put dye in the water of the white Phalaenopsis to try to turn it blue.
As for the size, its flowers range from 2 to 13 cm on average and, as mentioned above, last up to 3 months.
In a single flower spike, the number of flowers that can appear varies from 3 to 40 flowers.
Improving Phalaenopsis Blooming
To learn how to improve the blooming of these orchids, it is important that you have improved their cultivation.
These are techniques that professional growers use to achieve incredible and lasting blooms.
How to Have Flowers All Year Round
To have flowers all year round with your Phalaenopsis orchids, you must learn to delay their blooming.
And for that, there are some tricks.
If you use them correctly, you will not hinder their blooming or make the plant less healthy.
The first way to delay Phalaenopsis blooming is:
- Keep it at high temperatures at night (around 20ºC on average).
This is because it needs a drop in temperature at night to stimulate its blooming. If this does not happen, it will think it is not time to bloom yet, and its flower spikes will not appear or will take longer.
The second way to delay blooming is:
- Keep it at cooler temperatures after the flower spikes appear.
When the flower spikes appear, higher temperatures accelerate their development and make the flowers appear faster. But if you do the opposite, keep them at a lower temperature, the blooming will take longer.
These two tips are very simple and will help you if you have several orchids in your home.
This is because you can control them to have blooms all year round.
5 Tips to Improve Moth Orchids Blooming
: 9-Step Care Guide")
There are some tips that can make your blooming easier and also make it more beautiful.
With the tips below, you will be able to avoid diseases, fungi, and mainly, ensure that your orchid has a healthy blooming.
- Put cinnamon powder in your hand and blow it over the roots; this will protect it against fungi and bacteria and, according to some people, can help with blooming.
- Ethylene can make the flower buds of your orchid fall, and to avoid it, you must be careful not to place it near ripening fruits.
- Be careful with insufficient humidity and/or excessively low nighttime temperature; these factors can prevent blooming.
- Every blooming requires a lot from orchids, and in some cases, it is recommended that you avoid them for the health of your orchid. If it is very weak, cut the flower spikes five centimeters from its base. This way, you will ensure that your orchid has more energy, and probably next year its blooming will be much more beautiful.
- During blooming, don’t forget to put a piece of wood to anchor your plant;
Phalaenopsis Flower Spikes
There is much debate about what is best for Phalaenopsis in this matter.
Some say it is better to leave the spike to force a new blooming, and others to cut it to strengthen a future blooming.
Both sides have their advantages and disadvantages that we will see below:
Totally cut the flower spike
Here you will cut the spike near the base of the plant, where the spike emerged.
This way, you will make your orchid put all its energy into a better blooming in the future.
- Disadvantage: of this method is that you will not have a new blooming in the short term.
- Advantage: is that your Phalaenopsis will reward you with a larger blooming in the future.
Partial cutting of the flower spike
To encourage the regrowth of your orchid, what you should do is identify the nodes on the flower spike of your Phalaenopsis and cut at the 3rd node.
Thus, in some cases, it will emit a second flower spike (or a seedling, as mentioned before).
- Disadvantage: it spends a lot of energy from your orchid.
- Advantage: you will have a new blooming in 2 months or a seedling.
I recommend that you encourage a new blooming only if your orchids are healthy; otherwise, let them rest.
And avoid encouraging a new blooming if you plan to replant your orchid.
NOTE: in both cases, you should only do this when your plant’s blooming is over. Basically, this happens when the flowers start to dry.
Recommended articles:
Species of Phalaenopsis
Now you will see some of the most famous species of Phalaenopsis and also some characteristics about them.
Some are famous for being easy to grow, while others for their beauty.
It is important to remember that these are not all species of this genus; several have been left out, for example, Phalaenopsis equestris.
Phalaenopsis Amabilis
: 9-Step Care Guide")
Phalaenopsis amabilis is an orchid native to Asia and Oceania, being epiphytic.
It usually lives in tropical forests up to 600 meters above sea level.
One curiosity about this orchid is that it is the national flower of Indonesia.
It can reach up to 50 centimeters, while its flowers reach a maximum of 10cm and last from 45 to 60 days.
This orchid likes moderate humidity and is considered easy to grow.
Phalaenopsis Violacea
: 9-Step Care Guide")
The Phalaenopsis violacea is an epiphytic plant native to Indonesia.
It was discovered in 1859 and described in 1862, being widely used to produce Phalaenopsis hybrids.
It can reach up to 35 centimeters, while its flowers do not exceed 6cm.
Its blooming occurs between summer and autumn and usually lasts from 30 to 40 days, and its flowers are fragrant.
Phalaenopsis Aphrodite
: 9-Step Care Guide")
This is an orchid native to the Philippines and Taiwan.
It was published in 1862 by Hamb. Gartenz and is also well known as Phalaenopsis aphrodite.
It is a medium-sized orchid because its height can reach up to 60 cm.
Its blooming occurs in spring, but can also occur at other times of the year.
It can be considered a white Phalaenopsis orchid because its flowers are white and, in some cases, have yellow spots in the middle.
Phalaenopsis Schilleriana
: 9-Step Care Guide")
Phalaenopsis schilleriana is an epiphytic orchid discovered in 1860.
It is native to the Philippines.
It can reach up to 50 centimeters, while its flowers do not exceed 10cm, which is a good size.
Normally, its blooming occurs between spring and summer and lasts between 3 and 4 weeks.
Its flowers are purple or pink and fragrant.
Characteristics
Phalaenopsis is a genus in the Orchidaceae family, popularly known as moth orchids. Currently, there are 75 cataloged species, all native to tropical Asia. These species stand out due to the beauty and longevity of their flowers, which can last up to 3 months.
Cataloged in 1825 by Karl Ludwig von Blume, its name means “resembling a moth.”
It received this name due to its appearance, resembling a butterfly or moth.
- Phalaen means moth;
- Nopsis means resembling.
They can be found naturally in various countries, especially in:
- New Guinea
- China
- Nepal
- Taiwan
- Australia
- Philippines (which contains the richest diversity of phalaenopsis).
Mostly, moth orchids are epiphytic plants, growing on trees, albeit at a low height.
They can also grow on rocks covered with moss.
Remember that an epiphytic plant is not a parasite; it only uses the tree for support.
Conclusion
In this article, I tried to create a complete and detailed guide on how to care for moth orchids.
I hope you have learned a lot and achieve excellent results with your orchid. If you want to learn more about cultivation, I recommend checking out our articles:
Now it’s your turn, leave a comment sharing a bit of your story with Phalaenopsis.